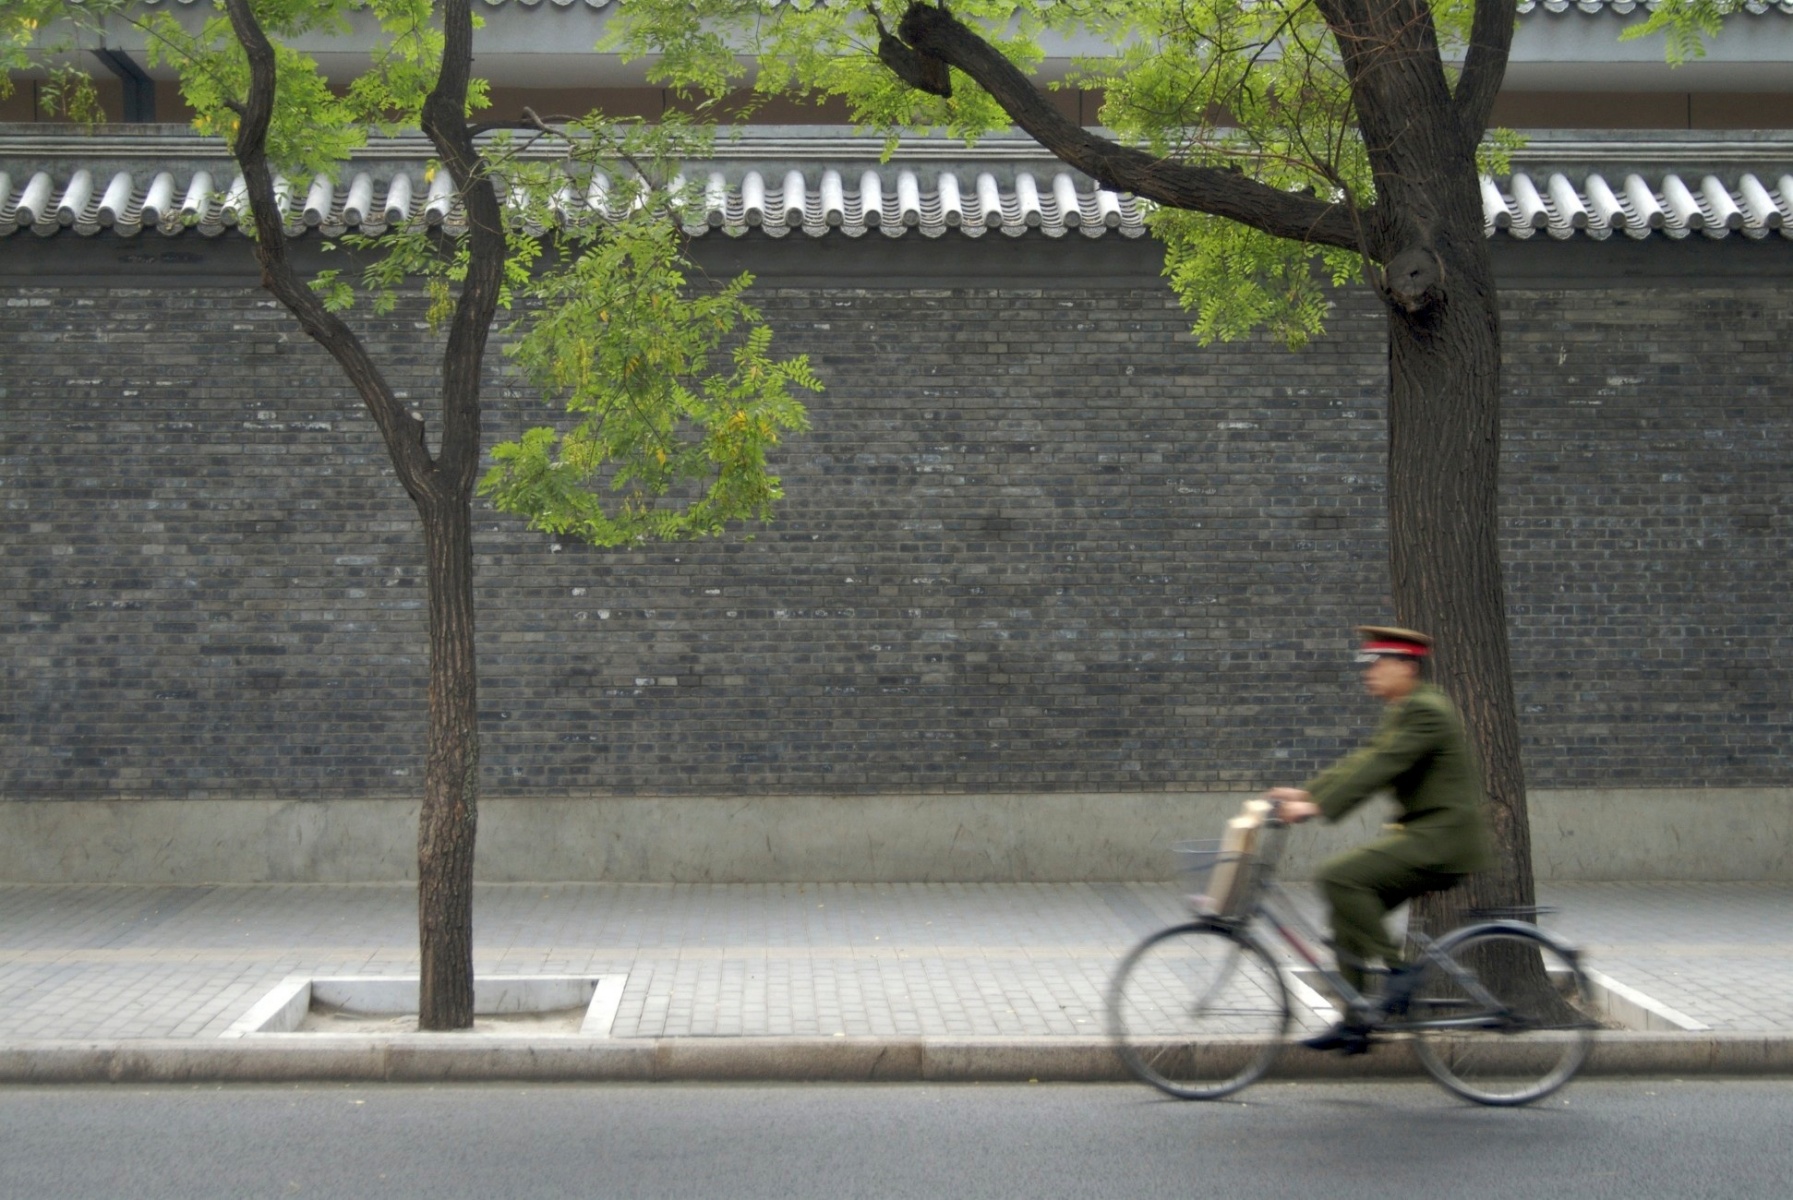
The rule of thirds is something that every photographer should be aware of and understand. It was coined in the late eighteenth century and related to painting. In fact, the rule of thirds is present in all types of art. It is one of the simplest things that someone who wants to improve their images can use when capturing images.
When it comes to photography, something like the rule of thirds is more of a guideline. But I guess the ‘guideline of thirds’ doesn’t quite have the same ring to it.
There are two ways to use the rule of thirds in your photography. The first is when the photographer decides where to put the horizon in the image. When photographing a scene, beginning photographers often put the horizon in the middle of the frame, giving the sky and the ground equal emphasis. This divides the viewer’s attention between the two halves and makes them equally important. What you want to do is divide your viewfinder into three equal horizontal sections. Now place the horizon either in the top or bottom third of the image to emphasize either the foreground or sky.


third of the frame with the sky, tree
and person in the top two-thirds.
If the foreground is more important then place the horizon in the top third of the image so we see more of the foreground. Or if the sky is more important, put the horizon in the bottom third of the frame so that the viewer sees more of the sky. Sometimes I will capture an image both ways and decide which I like better.

The second way to use the rule of thirds is to divide your viewfinder a second time. You have already divided your viewfinder into three equal horizontal sections. Now divide your viewfinder into three equal vertical sections so you have both vertical and horizontal lines. Place your subject in one of the 4 places where the lines intersect.

When the subject is placed in one of the four intersecting points, the viewer is able to look at the subject and in one sweeping motion explore the rest of the image and then come back to the subject.

If your subject is in the middle of the frame, the viewer’s eye will have more difficulty exploring the frame. They will start in the middle of the frame on the subject, look out to each corner of the frame and back in the middle of the frame.

When it comes to the exact placement, don’t worry too much about getting them exactly on the intersecting lines. Just try to place your subject in one of the 4 corners of the frame.
So which corner of the frame should I put my subject in?
Sometimes it isn’t obvious which composition will work best for the scene in front of you. In that case, I will capture a few different images, putting the subject at different intersecting points. Then I can decide later. With practice, you will get more and more confident and sure which intersecting point you want to put your subject in.
Workshop: Rule of Thirds
Part 1 – Choose a scene to photograph and put the horizon in the bottom third of the frame to emphasize the sky and capture an image. Then put the horizon in the top third of the frame to emphasize the foreground and capture another image.
Part 2 – The second part of this workshop involves dividing your viewfinder into equal thirds both horizontally and vertically to create a grid. An iPhone or iPad is great for this because you can turn on a grid lines and easily place the subject where the lines intersect.
If your camera allows you to turn on grid lines, then turn them on and use them to help you compose your image. Place your subject where one of those four points where the lines intersect. Try placing your subject in a couple of different points around where the lines intersect.
What you need:
You can use a phone or iPad – turn on grid lines in the settings to help you.
You can also use a camera with an interchangeable lens.
Remember:
The subject doesn’t have to be exactly where the lines intersect. Just try to get them into one of the four corners of the frame.
Rules are meant to be broken – the intersecting points are just guidelines – just get your subject away from the very centre.
Part 1–
Divide your viewfinder into three equal horizontal sections.
Align your horizon with either the top or the bottom third.
Part 2 –
Divide your viewfinder into thirds both vertically and horizontally.
Place your subject in one of the four places the lines intersect.


