
Multiple exposures images are a lot of fun. I have enjoyed overlaying images back when I started using film cameras. My attempts were not always a success and there was a slower learning curve with film because I had to wait to get the film developed.
An early film success and an early film failure when trying to capture multiple exposures of a landscape and the moon.
Options for Multiple Exposures
With digital images, there are a number of options that allow you to create multiple exposures. first, one can simply put multiple images into an image editing program like Photoshop and combine them together. One of the benefits of this approach is you have control over the amount of blending and the final look of the image. The problem is that it can be quite time consuming and requires you to have an image editing program that has this capability.
A second option is to use the multiple exposure function in your camera. Capture two consecutive images and the camera will put them together. This is just like using the multiple exposure option with film. It is quick and you are able to see the results right away. A drawback is that you have to capture the two images consecutively so if you make a mistake with one part, you have to take both images again.

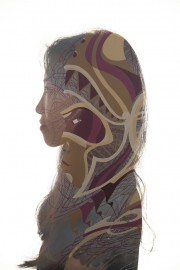
Multiple exposure portrait captured in camera.
The next option is my favourite option. It is called image overlay and I like this option best because it is pretty quick to create an image and you have some control over the final photo. I am using a Nikon D850 which has this function but you will need to check your camera model to see if it is able to combine two images.
You need to start by capturing separate images. The images will need to be RAW files and not as jpegs for the image overlay option to work.
When you select the image overlay option from the camera menu, you can select any two RAW files that you have on that memory card and combine them. You have a little control over the brightness of each of the files when combining the images. One of the great things about combining images this way is that you can use one RAW file multiple times for different image overlays. This enables you to try out different options where the multiple exposure method gives you one try at the combined image or you have to start again.
As we will see, the speed at which I could combine images in my camera and share them was crucial to the success of this challenge.
Getting Inspired
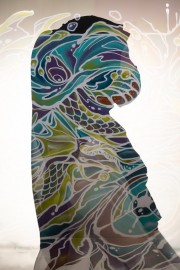
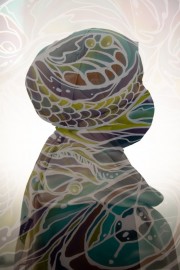
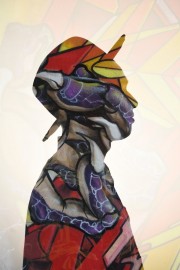
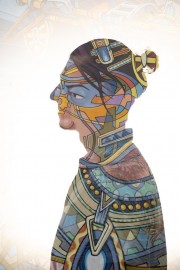
Photographer Andrew Hancock (twitter and Instagram) has created a number of multiple exposure images that were the inspiration for this challenge. I particularly loved his Tyler Lee image and the series of Mets baseball images (one, two & three). I wanted to try to capture something similar of the people of Singapore.
Inspirational Backgrounds
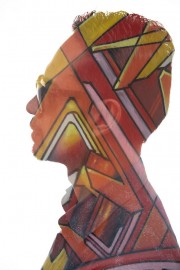
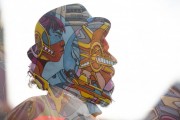
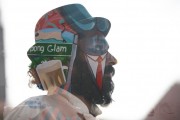
There are some amazing murals around Singapore that I decided to use for the backgrounds of the silhouette portraits. One of my favourite places for murals is in and around Haji Lane. There you can find artwork by Jaba, Song, Slacsatu, and Zero_rscls just to name a few. Their work is absolutely incredible and perfect for this challenge.
So I explored the walls and back alleyways to find various artwork. Some of the murals are smaller and others take up the entire side of buildings. I captured images of the the art using a variety of compositions. Some close up, some further away. Some horizontal composition and others vertical. I wanted to have options for when I combined them with the silhouette portraits.
Creating the Silhouette
To create a silhouette, you need to have your subject in front of a bright light source. The greater the difference in exposure between your subject and the bright background, the easier it will be to create a silhouette.
I have actually captured silhouette portraits before. I started by putting my subject in profile in front of a clear patch of bright sky and making sure my subject was in a shaded area so there was a big difference in exposure between them and the background. This makes it much easier to capture a silhouette.
The problem with this was that it isn’t always easy to get an image against the sky.

There are distracting elements in the background and I couldn’t quite get a silhouette against a bright sky.
So I needed to find a way a better way of consistently creating silhouettes while walking around on the streets.
A More Effective Way to Create a Silhouette
If I was in a photography studio, I would simply fire a strobe (flash) against the background behind my subject. So I thought, why not just take a small speedlight (in this case a Nikon SB910) with me and put it on a stand behind my subject. I could control the flash wirelessly from my D850 using a second speedlight or in my case, the Nikon SU800. Note: If your camera has a built in pop-up flash, you don’t need a second speedlight or a SU800 as you can use the pop-up flash to wirelessly control the speedlight.
Before turning on the speedlight, I need to know the exposure settings for the scene. In aperture priority mode the camera will give me the settings for a correctly exposed image. But I don’t want a correctly exposed image. I want to take a picture that is completely black. So I set my camera to manual exposure and changed the shutter speed and aperture until I have an image that is completely black.
Then I set the speedlight to manual power so I will get exactly the same amount of light from it every time. When I am outside, I usually have to set my flash to full power. I place the speedlight behind my subject and point it at the wall behind them.
I take a test shot and adjust the aperture and shutter speed until I am able to capture a silhouette of the person. Sometimes the speedlight isn’t powerful enough in brighter conditions and the corners of my frame are a bit dark but it generally works well.
Asking and Sharing
One of most important factors in my success when asking to capture someone’s portrait was my ability to show them some examples of the silhouette portraits I was telling them about. I had some examples on my phone when I was testing out capturing silhouettes at home with my kids. Everyone I asked allowed me to capture their portrait.
Another huge part of my success was my ability to quickly combine the two images right in my camera and then wirelessly transfer the pictures to my phone. I use a free app from Nikon called Snapbridge to transfer the images wirelessly from my camera to my phone. Then I either airdropped the photos to my subject if they had an iPhone or sent them to the via Whatsapp.
The biggest trouble I had was trying to capture everything on video while I was capturing the silhouettes. Normally I put my iphone in a holder that slides into the camera hotshoe. It is a great way to show my perspective as I move around capturing images. But in this case, I had to have the Nikon SU800 in the hotshoe to fire the speedlight wirelessly. So I either tried to use a different tripod for the video on the iphone or I held the iphone in my hand while shooting. I can safely say that neither worked very well. So be forewarned that the first person parts of the video from this challenge isn’t great. I may have to try the challenge another time with a better plan for capturing video. Regardless, I hope you like the video.
Thanks for all your support. As an Amazon Associate I earn from qualifying purchases.



You did a great job!! loved the results … nMum!!